A cool box earns its place pretty quickly on a camping trip. Cold milk for the morning coffee, something fresh for dinner and a drink that hasn't spent the afternoon warming up in the car all make camp more comfortable. It's frustrating, then, to open it on the second morning and find most of the ice has already gone. Often, the trouble began before the box left home.
A warm box, room-temperature drinks and a couple of small ice packs give the ice a lot of work to do. Getting more time out of it starts with cooling everything beforehand and leaving enough room for a substantial frozen load. After that, the useful habits are mostly about packing so you can find things, keeping the box shaded and replacing ice before the food warms up.
We've drawn on packing and care guidance from several cooler manufacturers, alongside the Food Standards Agency's advice on chilled food. Here's how we'd put that together for a camping weekend or a longer trip with ice stops along the way.
Cool the box before packing
Insulation slows heat travelling through the walls. If the box has spent the week in a hot shed, it also slows that stored heat escaping. Your first bag of ice then has to cool the box as well as its contents.
Bring it somewhere cool the day before leaving. Igloo recommends an overnight pre-chill, ideally with ice inside; RTIC suggests filling its hard cooler at least halfway with ice overnight, or for a full day. Close the lid while it cools. Those timings are useful preparation windows for a thick-walled box that has been stored warm. [1] [2]
Before loading food, empty the pre-chilling water and replace melted ice with a fresh frozen supply. Reusable packs work well for this job too, provided you can refreeze them before departure. We'd use spare packs or a separate bag of ice to avoid setting off with the trip's supply already half thawed.
Let the fridge do the cooling at home
Chill the drinks as well as the food. It's easy to remember the milk and overlook the cans bought on the way out. Coleman estimates that cooling 3.7 litres of room-temperature liquid uses about 1.13 kg of ice. That's a sizeable part of a bag gone before it has helped keep anything cold at camp. [3]
If you're cooking ahead, cool the food promptly, divide it into manageable portions and refrigerate it before packing. Food Standards Scotland advises against leaving cooked food at room temperature for more than 1-2 hours. Freeze suitable meals before their use-by date and follow the food's freezing and defrosting instructions. [10]
A frozen meal can contribute to the cold load, but plan when it will thaw and be eaten. Keep it at fridge temperature while defrosting, in a sealed container. We'd label portions with the meal and date before freezing; finding Saturday's dinner is much easier without opening three identical tubs.
Use blocks for staying power and cubes for the gaps
For a longer trip, we'd use a mixture of substantial blocks and loose cubes. Coleman recommends blocks for longer cooling and cubes for cooling food and drinks quickly. RTIC suggests combining them, with cubes filling the spaces around the larger pieces. [2] [3]
Frozen water bottles are a convenient way to make blocks without leaving everything floating in loose meltwater. Use freezer-suitable plastic containers and leave expansion space. YETI advises filling bottles or jugs only about 90% full before freezing. Freeze them solid well before packing, rather than putting them in the freezer late the night before. [5]
Reusable packs are convenient when you want to keep the contents dry, as Igloo notes for soft coolers and loosely wrapped food. Choose enough frozen material for the load. We'd think about the total volume of ice or packs before buying a clever shape that only covers a small part of the base. [1]
For a weekend away, a broad frozen bottle or block underneath, packs beside food containers and cubes around the remaining spaces make a practical combination. Keep anything vulnerable to freezing away from direct contact with the coldest packs.
Leave room for the ice
Filling a large box with food and then squeezing a few ice packs down the sides is tempting, especially with several people to feed. It also leaves very little frozen material to absorb the incoming heat.
YETI recommends two parts ice to one part chilled contents for maximum cold retention. Engel spells that out as roughly two-thirds ice and one-third food and drink. That is a lot of ice, and it changes how much food space you should expect from a box. [4] [7]
As a planning example, allowing about 10 litres for chilled provisions means allowing roughly another 20 litres for ice at that ratio. Containers and awkward shapes take up space too. We'd lay out the actual frozen packs, bottles and food before deciding the box is big enough.
For a short outing with an ice top-up nearby, you may choose a different balance. For several hot days away from shops, we'd give ice more space and take fewer bulky chilled extras. A smaller menu is easier to keep cold than a box packed to the lid with food.
Pack for the meals you will reach for
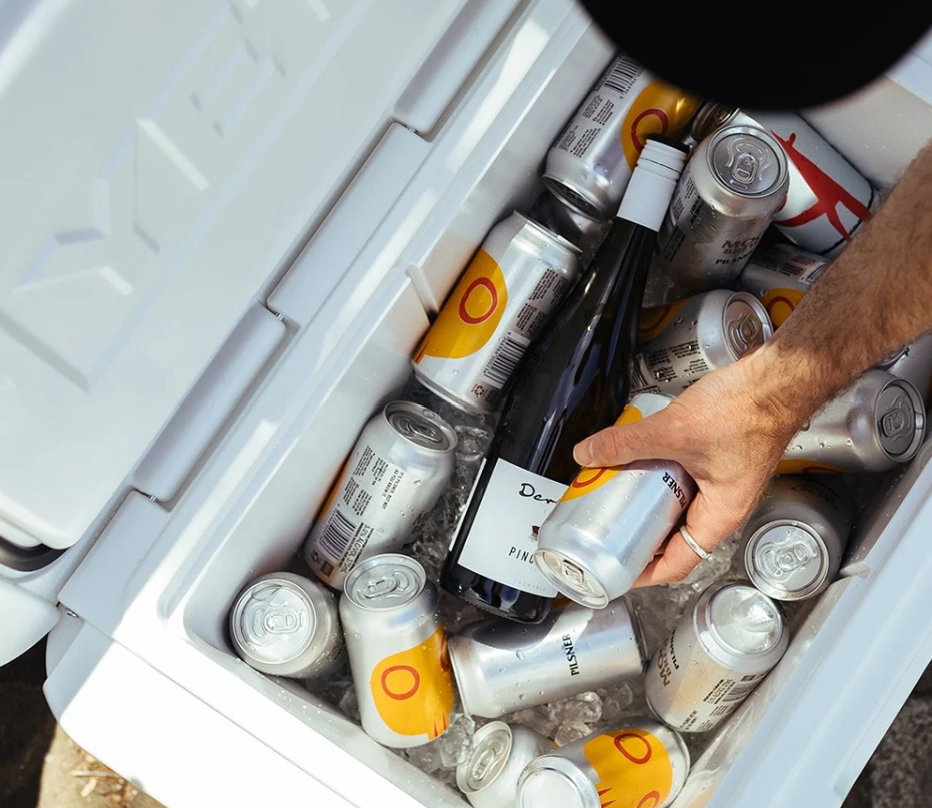
We'd pack in meal groups, with the next meal easy to reach. Put the block ice or frozen bottles down first, then arrange sealed containers among the cold sources and finish with ice or packs above. RTIC recommends ice at the base, between the chilled contents and on top. [2]
Keep raw meat and fish in secure, leakproof containers, separate from ready-to-eat food. A second container is useful around packaging that may leak as it thaws. The Food Standards Agency recommends separating raw and ready-to-eat foods when camping; Food Standards Scotland also warns about liquid released by defrosting meat. [8] [10]
A basket is handy for sandwiches and other things you want to keep dry. It still needs cold sources nearby. We'd put the thermometer beside the food stored there, rather than assume the top is as cold as the ice underneath.
Keep a rough packing order in mind, or label containers so their contents are visible from above. If breakfast is in one place and tonight's dinner in another, you can get what you need without pulling half the box onto the picnic table.
For a group staying several days, we'd consider a separate drinks box. Coleman recommends this because drinks tend to be fetched more often. It lets the main food supply stay closed while people help themselves through the afternoon. [3]
Give it shade for the whole afternoon
Think about where the sun will be later, rather than where the shade happens to fall when you arrive. Under a suitable shelter or a reliably shaded table is more useful than a patch that will be in full sun by lunchtime.
RTIC recommends keeping the box shaded and putting a mat or towel underneath when the surface is hot. Canyon also advises keeping it out of direct sunlight. We'd move it off sun-heated paving or a hot deck and avoid leaving it in a parked vehicle once camp is set up. [2] [6]
Engel suggests a light towel over a passive cooler when needed. Keep it arranged so the lid can close properly. This guide is about insulated ice boxes: powered coolers and fridges need their ventilation openings kept clear. [7]
Open the lid, take out what you need and close it again before preparing the meal. Leaving it propped open while you cook gives the surrounding heat far more time to get in.
Keep clean meltwater until you need the space
Loose ice eventually gives you a mixture of ice and cold water. There's no need to drain it every time you open the box. YETI and Igloo both advise retaining the cold meltwater where practical, while keeping exposed food out of it. [1] [4]
Drain enough to make room when you're adding fresh ice, or when the contents need to stay dry. YETI's packing advice makes that distinction too. If a raw-food container has leaked, deal with the contamination and clean the box; retaining dirty water for the sake of a little more cooling is a poor trade. [5] [8]
Keep drinking water inside its own clean, closed bottles. Loose meltwater has been in contact with packaging and the inside of the box, so we'd never use it as the drinking-water supply.
Check the storage temperature, not the number of ice days
A small fridge thermometer is a much more useful camping accessory than guessing how cold a tub feels. The Food Standards Agency's camping guidance says to keep food at 5°C or below and check the temperature inside an insulated cooler. [8]
Place it beside the perishable food, away from direct contact with an ice block. Read it when packing and when checking the food at camp. If you have food stored in separate parts of the box, check those areas too. We'd pay particular attention to containers near the top as the ice level falls.
Plan to add ice before the food warms above that target. A few remaining cubes in a corner tell you where there is still ice; the thermometer tells you about the food-storage area you're relying on.
In hotter-than-usual weather, the Food Standards Agency says to discard perishables left out of refrigeration for more than two hours. It also advises against serving food when you're unsure how long it has been out. Treat chilled storage in a cool box as refrigeration only while it is maintaining the required temperature. Adding fresh ice later does not undo an earlier period of unsafe storage. [9]
Build the next ice stop into the trip
For a longer holiday, we'd plan around replenishment rather than trying to make the first load last until the journey home. Check whether the campsite sells ice, offers a freezer-pack exchange or has a fridge guests can use. Ask how the exchange works and whether your packs will be fully frozen when you need them.
If there is a freezer available, two sets of packs let one set freeze while the other is in use. Bring the fresh set to the box before removing the thawed one. If you're buying bagged ice, make the stop part of a food shop so you're replacing the cold supply at the same time as loading chilled provisions.
Buy chilled and frozen food last, then get it into the prepared box promptly. The Food Standards Agency recommends cool bags with ice or gel packs during hot-weather shopping. We'd avoid turning the next supermarket visit into an excuse to fill the remaining space with warm drinks. [9]
If the route has no dependable way to replenish ice, adjust the food plan. The Agency's camping advice suggests dry foods when chilled storage cannot be maintained. Pasta, lentils and suitable shelf-stable ingredients reduce the amount of perishable food you have to keep cold. [8]
Check the lid before blaming the insulation
Crumbs, grit or a folded food bag can stop the lid seating properly. Canyon recommends keeping the gasket clean and closing the latches fully. Engel warns against packing so tightly that the lid bulges and the seal opens. [6] [7]
Wipe the sealing surfaces and check that nothing crosses the rim. If a latch is broken, the lid is distorted or a fitted gasket has pulled out, repair that fault with the correct replacement parts before buying more ice packs. On a soft bag, make sure the zip closes fully and isn't held apart by an oversized container.
After the trip, wash the box with mild detergent and water, rinse it and let it dry thoroughly with the lid open. Coleman and Igloo both include drying in their care advice. A clean, dry box also makes it easier to spot a damaged seal or missing drain plug before the next trip. [1] [3]
Dry ice needs a different setup
We'd stick with ordinary ice, frozen bottles or reusable packs for routine camping. Dry ice releases carbon dioxide, can cause cold burns and can build pressure inside a sealed container. Engel limits its dry-ice advice to compatible models and requires protected handling, ventilation and a way for gas to escape. Don't put it into an arbitrary cool box, tent or enclosed vehicle as a shortcut to longer cooling. [7]
The weekend routine we would use
- The day before: cool the empty box, refrigerate the provisions and freeze the blocks or packs solid.
- Before leaving: replace the pre-chilling supply, pack the food among plenty of frozen material and check the thermometer.
- At camp: choose lasting shade, keep meals easy to find and close the lid while cooking.
- As the ice runs down: replenish it while the food is still cold, or use a different food-storage plan.
For a closer look at a substantial hard cooler in use, our YETI Tundra 65 review covers a Mediterranean sailing summer, including packing space, latches and the effort of carrying it loaded. For the cooking side of camp, see our camping stove care guide.
Sources and further reading
Manufacturer guidance and food safety
Guidance checked on 3 November 2026. Packing and care advice draws on the manufacturers below; food-storage temperatures and handling advice come from the food-safety authorities.
- Igloo: pre-chilling, ice, meltwater and cleaning
- RTIC: preparing and packing a hard cooler
- Coleman: ice types, packing and cleaning
- YETI: ice-to-contents ratio and keeping meltwater
- YETI: frozen bottles and replenishing ice
- Canyon Coolers: lid seals, shade and packing
- Engel: ice volume and dry-ice precautions
- Food Standards Agency: camping food safety
- Food Standards Agency: food safety in a heatwave
- Food Standards Scotland: chilling, freezing and defrosting food