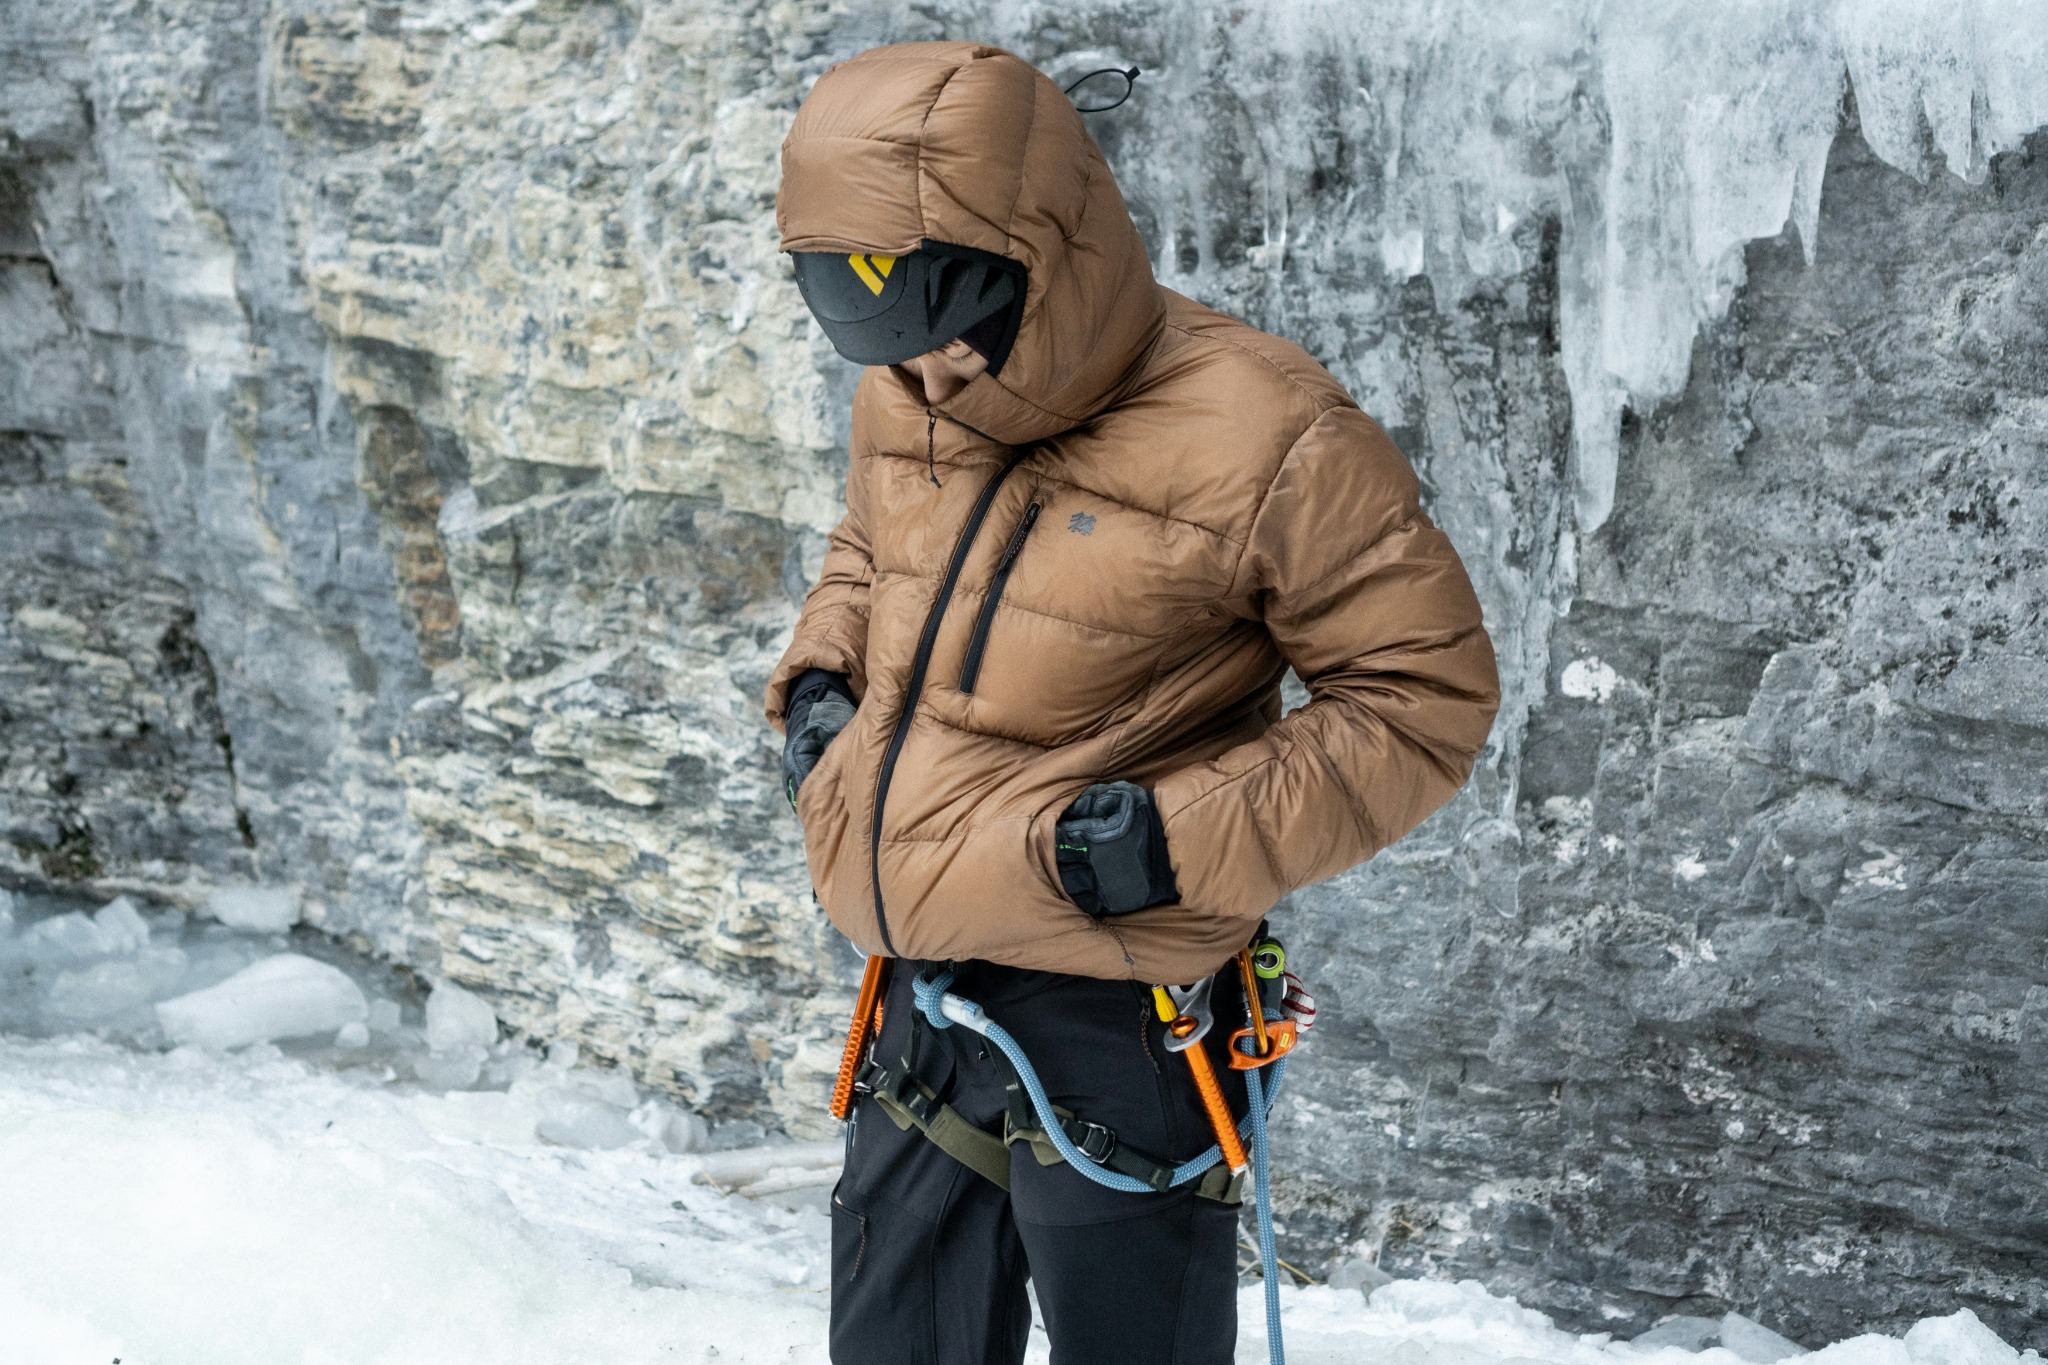
To wash a down jacket and make it fluffy again, use a suitable down cleaner, rinse it thoroughly, then dry it completely on the low-heat setting its label permits. Pause the dryer regularly to gently loosen clumps and redistribute the filling. The washing is usually the short part; getting all that down dry can take several hours.
A good down jacket is worth looking after. It's the thing you reach for on a cold morning, pull on when you stop walking and keep close by for an evening at camp. Sweat, grubby cuffs and months squeezed into a stuff sack can leave it looking rather less inviting. A proper clean and patient dry can bring back a surprising amount of puff.
The alarming moment is often when it comes out of the washing machine. A jacket that went in looking reasonably healthy can emerge thin, heavy and full of lumps.
Norrøna describes that temporary loss of loft as normal: wet down collapses together. [1] The jacket needs the rest of its care routine before you judge the result.
This guide draws on the technical recommendations of Rab, Patagonia, Norrøna, Mammut, Montane, Mountain Equipment and the companies that make down cleaners and repair products. We'll go through the measurements, machine settings and awkward bits, including what to do with a jacket that's already been washed and still looks flat.
If your jacket is already washed and clumpy
Check its drying label, then continue low-heat tumble drying where allowed, with clean dryer balls or tennis balls. Stop about every 20-30 minutes, support the jacket and gently work the remaining lumps apart through the fabric. Check the filling throughout the sleeves, hood and body. A dry outer shell can hide damp down.
Check the filling and care label before starting
Look for the filling composition on the inside label. Goose or duck down, often listed with a percentage of feathers, belongs in this guide. Polyester insulation, including products described as synthetic down, has a different structure. The word “puffer” describes the style of jacket, so it doesn't tell you which washing routine to use.
Find the washing temperature and dryer symbol too. Don't guess from the brand name or copy the settings from another jacket in the cupboard. Norrøna gives a general gentle-wash recommendation of 40°C for its down clothing; Montane describes a typical 30°C gentle wash. The label on the particular garment sets the limit, and your cleaner needs to work within it. [1] [2]
Patagonia's current down-care help page recommends cold to low-temperature washing, with no bleach, fabric softener or ironing. That's a useful reminder to keep the iron used for some waterproof-shell care away from an ordinary down jacket. A rumpled finish is a much smaller problem than melted shell fabric. [3]
Check removable trims and liners before loading the machine. Take off anything the label says cannot be washed, and set it aside somewhere you won't lose it. If the jacket specifies professional cleaning, identify the complete model and ask the maker which service it needs. Leather panels, trims and other construction details can change the job.
For a synthetic jacket, use that garment's instructions rather than trying to pull its filling apart like loose down. Mountain Equipment recommends Grangers Performance Wash for its synthetic insulation and Down Wash for down. It also notes that many lightweight synthetic jackets air dry readily. We'll keep the clump-separating technique below specific to down. [4]

Wash when it needs it, and spot-clean small marks
Give the jacket a look over in daylight. The inside collar and cuffs usually tell you more than a quick glance at the chest. Look for a dark, greasy patch where your chin sits, a stale smell that airing hasn't shifted, or filling that stays flat after the jacket has been unpacked and aired.
Rab recommends washing once a season, or sooner when the jacket is visibly dirty or its down looks flat or clumpy. Jack Wolfskin puts more emphasis on airing and spot-cleaning, reserving a full wash for when it's needed. These are useful approaches to compare: regular winter use can call for a seasonal clean, while a jacket worn for a few dry evenings may only need attention to a dirty cuff. [5] [6]
Deal with a little mark locally before soaking the entire jacket. Montbell describes diluted down cleaner on a sponge or towel for surface dirt. Work gently over the affected area, then remove the cleaner with a clean damp cloth and let the area dry. Keep the filling as dry as you can while you're cleaning the outer surface. [7]
For more ingrained dirt before a full wash, Nikwax allows its down cleaner to be used undiluted on stubborn stains. Use the cleaner intended for the wash you're about to do. Avoid trying several household stain treatments in succession; you then have a mixture of residues to rinse from a delicate shell and its filling. [8]
Pick a day when you'll be around for the drying. Starting the wash late at night because the machine is free leaves you with a heavy, wet jacket just as you want to go to bed. Get the cleaner, towels and drying space ready first, and allow a proper afternoon for the whole job.

Prepare the machine and check for small tears
Empty every pocket, including any little internal one. A forgotten tissue is annoying enough in normal laundry; picking fragments off a freshly washed shell adds a job you don't need. Check for keys, sweets and anything else that could damage or stain the fabric.
Run your hands over the outside and inspect the seams. Patch a small hole before washing so the filling stays inside, and let the patch bond for the time its instructions specify. The repair section below gives a worked example. If the jacket has a substantial tear or an opening internal baffle, arrange that repair before putting it through a wash.
Montane recommends cleaning residual detergent and softener from the washing machine with a service or rinse cycle. Rinse the dispenser drawer too, including the little recesses where softener collects. Close zips and hook-and-loop fastenings. Mammut also recommends loosening elastic drawcords so the jacket isn't held under tension during the wash. [2] [9]
A front-loading machine is a useful choice. Patagonia's illustrated wash guide recommends avoiding top-loaders with an agitator, which can damage the jacket. If you only have a top-loader, find out whether it has a central agitator and what the jacket maker allows before using it. A larger front-loader at a laundrette can be a better option for a bulky parka, provided its programmes and dryer temperature suit the garment. [16]
Give the jacket the drum to itself. It needs space to wash and rinse, and a wet down garment is heavy enough without adding towels and jeans to the load. Rab also recommends turning its down jackets inside out after fastening them. Keep that model-specific preparation alongside the label photo if you have more than one insulated jacket. [5]
Measure the cleaner and give the jacket a full wash
Choose a cleaner labelled for down, including hydrophobic down if that's what the jacket contains. A bottle designed for a waterproof shell isn't automatically the right choice for its insulation. And a cleaner and a reproofer do different jobs, even when the bottles sit beside each other in the shop.
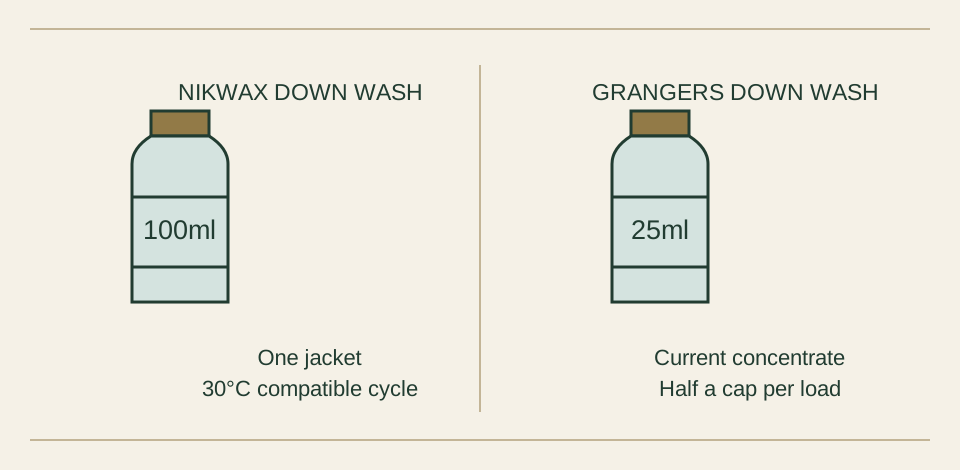
| Cleaner | Current UK machine-wash instructions | What to measure |
|---|---|---|
| Nikwax Down Wash / Down Wash Direct | One garment; 30°C synthetic cycle, slow spin and an extra rinse if possible. [8] | 100ml for the clothing load. |
| Grangers Down Wash, current concentrated formula | Full cycle at 30°C, or as permitted by the garment label. [11] | Half a capful, 25ml, per wash load. |
That's a substantial difference in dose, so measure the liquid instead of remembering a cap count from another bottle. Grangers has changed its concentration: its current product page specifies 25ml, while older bottles and instructions can differ. Read the bottle you own before pouring. More cleaner gives you more to rinse out, rather than a shortcut to a fluffier jacket.
For a straightforward Nikwax example, shake the bottle, put one prepared jacket into the clean machine and add 100ml to the detergent dispenser. Select the compatible 30°C synthetic programme with a slow spin and add the extra rinse. Let the full programme run. If the jacket's label requires a different method, choose a cleaner and process compatible with that requirement before starting. [8] [17]
Rinsing deserves as much attention as the wash. Norrøna specifies two rinses, and Patagonia explains that leftover soap can interfere with the down lofting fully. If the machine has no extra-rinse option, run an appropriate separate rinse after the wash. Keep fabric softener out of the process. [1] [16]
Use the spin speed permitted for the garment. Mammut recommends 400-600rpm in its general down guide, while Nikwax warns that a fast spin with a water-heavy item can damage internal baffles. Start gently; don't jump straight to the machine's highest spin in an effort to finish the drying sooner. [9] [8]
Hand-wash with enough room to rinse properly
Hand washing is an option when the label allows it, especially if the jacket is too bulky for your machine. It takes more handling and uses a lot of rinsing water, so get the bath or basin clean before the jacket goes in. Rinse away household cleaning products first.
Nikwax's hand-wash instructions for one item use 100ml of its down cleaner in 12-15 litres of warm water. Wet the jacket through, work the solution through it gently, leave it for five minutes, then agitate it again. Rinse thoroughly until the water runs clear. Wear gloves, as its instructions specify. [8]
Press the jacket under the water gently rather than twisting it into a rope. Give water time to enter the filling. When draining, support the jacket in the basin and press water out without pulling on the shoulders or sleeves. Refill with clean water and rinse through the thicker parts as well as the easy-to-reach body panels.
For extracting water afterwards, Nikwax recommends three slow spins in a washing machine when that's available and compatible. If the reason for hand washing was a machine restriction on the jacket label, don't assume a spin programme escapes that restriction. Keep supporting the wet garment and use the permitted extraction method instead.
Have the drying plan ready before you start. Hand washing can leave a great deal of water inside the down. A jacket that has stopped dripping can still have sodden clumps hidden in its hood, hem and sleeves. Move straight into drying rather than leaving it folded in the bath while you decide where it can go.
Dry slowly, and help the down open out again
Lift the wet jacket with both hands underneath it. Rab recommends cradling larger items in a bath towel because waterlogged down can strain the internal compartments. Don't haul it out by the hood or one sleeve. Carry the weight to the dryer rather than letting it hang from the shell fabric. [5]
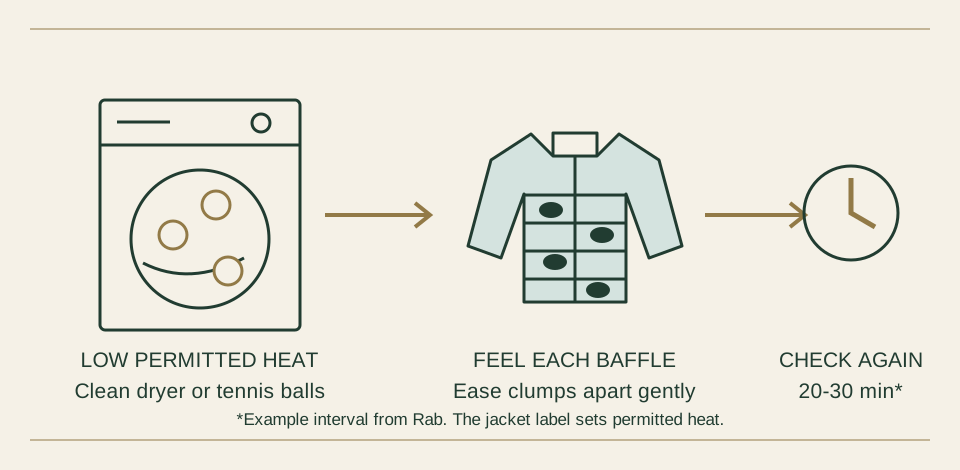
Use the low-heat tumble setting allowed on the label and give the garment room to expand. Add clean dryer balls or tennis balls according to the maker's guidance. Patagonia suggests two to three clean tennis balls; Montane also recommends two to three balls. They help separate the filling as it moves around the drum. Leave dryer sheets out. [3] [2]
Set a reminder to check progress. Montane uses 20-minute intervals; Rab says every 20-30 minutes. Pause the machine, take the jacket out with support, give it a gentle shake and feel along the baffles. Those are the stitched compartments holding the down. [2] [5]
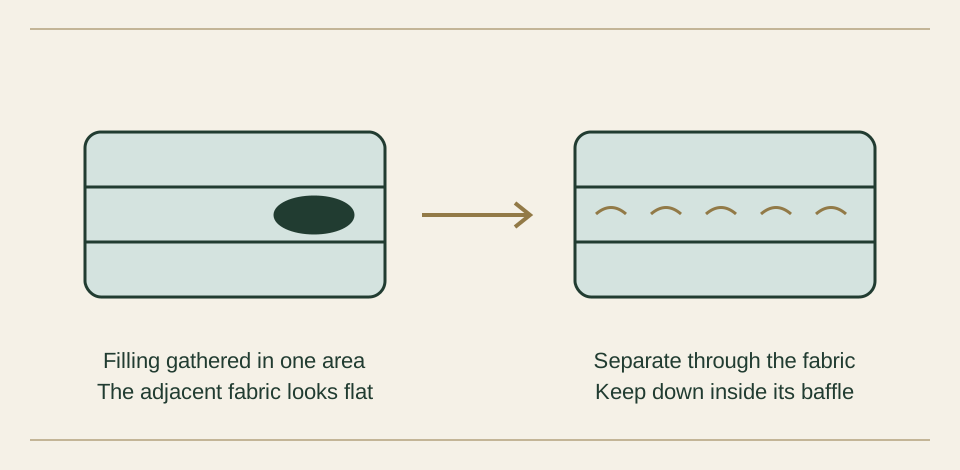
When you find a lump, cup that section in one hand and use the fingers of the other to ease it apart through the fabric. Work a little at a time. You're loosening the mass and spreading it back through its own compartment, without dragging it across stitched boundaries. Be particularly gentle while it's wet. Return it to the dryer and check again after the next interval.
Patagonia describes how a whole compartment's filling can be gathered into a surprisingly small lump. That explains why one area can look empty while the jacket is still drying. Finding and loosening that lump helps the filling dry more evenly instead of leaving its centre damp. [10]
Allow several hours. Rab gives a typical drying range of three to five hours, depending on the size of the item. Use that to plan your afternoon, then judge completion by the filling throughout the jacket. A timer finishing or an outer shell feeling crisp and dry doesn't finish the job on its own. [5]
A laundrette dryer needs the same attention. Patagonia warns that commercial machines can run hot even on a low setting. Confirm there is a suitably gentle programme, check early and keep monitoring it. High heat can damage the shell; it doesn't provide a useful way to hurry stubborn clumps. [10]
Get a washed, flat jacket fluffy again
If you're reading this with a freshly washed jacket draped over a chair, start by feeling the filling. Work through the body, each sleeve, the hood and the thicker fabric beside the zip. A smooth shell can conceal quite firm lumps inside it.
For a clean jacket with damp clumps, continue the permitted drying routine. Montane recommends returning it to the dryer with balls for further 20-minute intervals when the filling hasn't redistributed. Gently work persistent lumps apart between intervals and compare how the same section feels each time. [2]
| What you find | What to do next |
|---|---|
| Dry shell, firm or cool-feeling lumps inside | Keep drying at the permitted low setting. Check the filling after it has cooled, rather than judging it straight from the warm drum. |
| A thin patch beside a large lump in the same baffle | Ease the lump apart and distribute the filling within that compartment. Return to the drying routine. |
| Foam, a strong detergent smell or a slippery feel after washing | Rinse out the remaining cleaner before restarting the drying job. Don’t add another dose of detergent. |
| Down moving between compartments or one persistently empty section | Inspect the stitching and arrange a baffle assessment. More dryer time won’t repair an open internal seam. |
| Burnt, melted or visibly torn fabric | Stop the laundry process and arrange repair. Keep further heat away from the damaged area. |
Checking for cool, dense spots is a useful way to find areas needing more attention, but combine touch with the overall result: the filling should be dry, open and distributed throughout the garment. Norrøna emphasises checking the down itself rather than relying on the outer fabric. [1]
If the jacket still stays flat after thorough drying, look back at the wash. A cleaner unsuitable for down, too much product or an incomplete rinse can leave you with another job to do. Rab describes re-washing and very gently manipulating clumps before tumble drying as a route for persistent problems. Use a proper down cleaner and finish the rinse and drying stages this time. [12]
Take a photo of any section that stays empty, and check for down escaping elsewhere. Lost filling and broken internal stitching need a repairer's assessment. Cleaning can remove contamination and loosen compressed down; it can't replace filling that's left the jacket.
Allow several days if you need to air dry
Air drying requires space, dry air and regular attention. Before committing to it, check that your jacket maker allows it. Norrøna recommends tumble drying its down clothing. Mountain Equipment advises using its professional service for insulated waterproof jackets if you don't have immediate access to a dryer. Those differences should shape the plan before the jacket gets wet. [1] [4]
Where air drying is appropriate, lay the jacket flat on a clean drying rack or towel in a warm, dry, ventilated room, out of direct sunlight. Support the sleeves and body. Turn it regularly, replace a damp towel and gently work the filling apart as it dries. Patagonia's down-care guidance describes this method taking anything from a couple of days to over a week, depending on humidity. [10]
Jack Wolfskin gives a useful interval for its air-drying method: fluff the jacket every two hours on the first day. Plan around that involvement, rather than leaving it flat and untouched for a weekend. The underside needs air too, so turn it over and check the thick areas when you do. [6]
Keep it off a radiator. Don't use a hairdryer to blast individual lumps. Mammut warns that concentrated heat can damage the fabric and won't dry the filling evenly. A surface that becomes hot while the centre of a baffle remains damp gives you two problems at once. [9]
If your home stays damp or you need the jacket soon, arrange access to a compatible dryer or the maker's wash service. A down-cleaning service should include the complete washing and drying process. A standard dry-cleaning order is a different treatment: Norrøna and Patagonia advise against dry cleaning their down garments. [1] [10]

Renew water repellency only when the jacket needs it
Get the jacket clean before deciding it needs a new treatment. Once the shell is dry, sprinkle a little water onto it. A face fabric that absorbs drops instead of shedding them can need renewed durable water repellency, or DWR. This treatment helps the outer fabric resist wetting out; a typical lightweight down jacket still needs a waterproof shell over it in sustained rain.
If you already know an ordinary down garment needs reproofing and its maker accepts a down-specific wash-in treatment, Nikwax gives a concrete routine. Clean with its down wash first, then use a separate cycle with 150ml of Down Proof for one clean jacket. Its instructions specify a 30°C synthetic programme, slow spin and an extra rinse if possible. Keep the jacket wet between the cleaning and proofing cycles. [13]
Down Proof treats both the outer fabric and the down filling. Nikwax says the treatment doesn't need heat to develop water repellency, but it still recommends tumble drying where permitted to get the insulation thoroughly dry. Finish the down-drying job even though the treatment itself can work without heat. [13]
Don't substitute a bottle of ordinary shell wash-in proofer because it's already in the cupboard. Choose a treatment that names down compatibility and is accepted for that garment. A waterproof down ski jacket has both insulation and a membrane to care for: Arc'teryx recommends a down wash for its two-layer down-insulated GORE-TEX jackets. [14]
For a membrane garment, keep the model's complete instructions together rather than joining half a shell routine to half a down routine. Our GORE-TEX care guide covers surface beading, spray treatments and material-specific exceptions. Any reproofing needs to preserve the construction as well as the filling.

Keep feathers inside and patch small holes properly
An occasional quill poking through a seam is something to handle gently. Mountain Equipment advises pinching the cluster from behind the fabric and drawing it back inside. Pulling it out from the outside can enlarge the opening and encourage more filling to follow. [4]
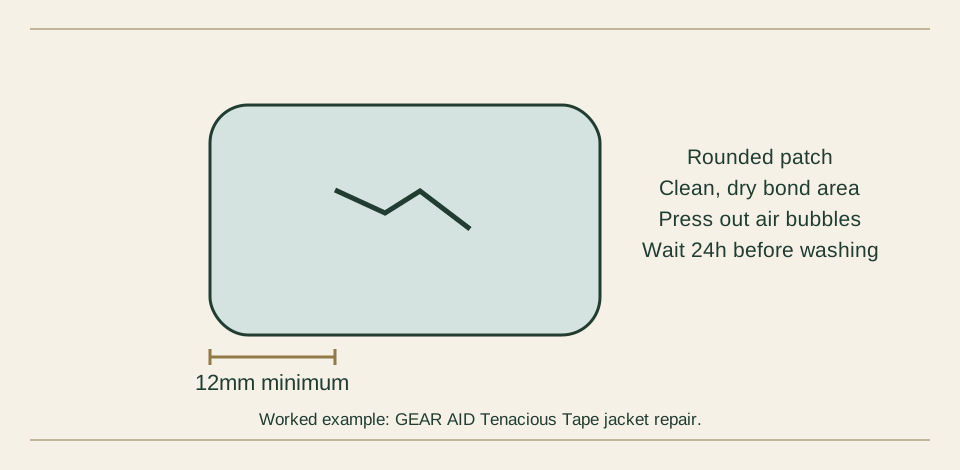
A small tear in an ordinary nylon or polyester shell can be a job for a suitable self-adhesive fabric patch. GEAR AID's Tenacious Tape range includes repair tape and patches for those fabrics. A GORE-TEX shell has a named GORE-TEX Fabric Patch option. Match the repair to the shell construction, and keep adhesive away from loose exposed down. [15] [18]
For its peel-and-stick jacket repair, GEAR AID specifies cleaning the bond area with isopropyl alcohol to remove oils. Test the cleaner on a hidden spot first and keep it away from sensitive prints or trims. Let the area dry, bring the torn edges together without overlap or tension, and apply a rounded patch with at least 12mm of coverage beyond the damage on every side. Press from the centre outward so the edges lie flat and air bubbles come out. [15]
If you're patching before a wash, GEAR AID says to allow at least 24 hours before laundering. That's the timing for this adhesive system. Other repair products can have different bond or cure requirements, so read the packet on your own kit before booking in the wash. A patch applied five minutes before loading the machine may not have reached its intended bond strength. [15]
Leave large tears, separating baffles and major filling loss to a repairer. Describe the fault, send photographs and ask whether the service includes replacing lost down or repairing internal compartments. That gives them a useful starting point, rather than a request to wash a jacket whose structure needs work first.
Finish the drying, then store it with room to loft
Once the jacket looks puffy again, let it cool and check it throughout. Feel the hood, the ends of the sleeves, the hem and the pockets. Open the jacket out so you can reach the lining as well as the outside. You're looking for evenly distributed filling without the dense damp masses you felt earlier.
Nikwax recommends airing a Down Proof-treated item for at least a day in a warm, dry space after tumble drying before packing it away. That provides a useful final stage after the machine has done its work. Keep checking the thick areas rather than sealing a warm jacket into a bag as soon as the dryer stops. [13]
Store it uncompressed. Mountain Equipment suggests hanging insulated clothing in a wardrobe or keeping it loosely in a large storage sack or pillowcase. Its small stuff sack or pack pocket is useful for travel, but shouldn't become its long-term home. [4]
After the next trip, unpack it before the rest of the kit disappears into the cupboard. Air it, deal with new dirt and check any repaired area. It takes less effort to clean a small fresh mark than a collar that's collected another season of grease.
The habit to keep is patience at the drying stage. Measure the cleaner, give the jacket a proper rinse and handle the wet filling gently. Then let low permitted heat, movement and regular clump checks do their work. When the down is dry and open throughout, the jacket should feel like something you'll be pleased to pull on for the next cold evening.
Keep the rest of your outdoor kit in good shape
Our guide to GORE-TEX care and restoring water repellency covers washing and reproofing waterproof shells. For the rest of your kit, see our practical guides to hiking boot care and making a tent last longer.
Sources and further reading
Manufacturer guidance checked on 2 November 2026.
- Norrøna: 40°C washing, double rinsing, wet clumps, loft and garment care
- Montane: 30°C washing, preparation and 20-minute drying checks
- Patagonia: cold washing, dryer balls and prohibited treatments
- Mountain Equipment: synthetic versus down care, feathers, repairs and storage
- Rab: washing frequency, wet handling, drying intervals and duration
- Jack Wolfskin: wash frequency and air-drying attention
- Montbell: down care and local cleaning with diluted down cleaner
- Nikwax: down-cleaner dosage, machine and hand-wash routines, spin precautions
- Mammut: preparation, 400-600rpm spinning and avoiding concentrated heat
- Patagonia: agitator risks, rinsing, clump separation and air drying
- Grangers: current concentrated Down Wash dosage and compatible filling
- Rab: persistent clumps, gentle redistribution and re-washing
- Nikwax: Down Proof treatment, dose, separate cycle and airing before packing
- Arc'teryx: care of down-insulated GORE-TEX jackets
- GEAR AID: compatible repair tape, cleaning, overlap and time before washing
- Patagonia and iFixit: illustrated down-jacket washing and drying instructions
- Nikwax: current down-care routine and measuring the cleaner
- GEAR AID: Tenacious Tape fabric compatibility